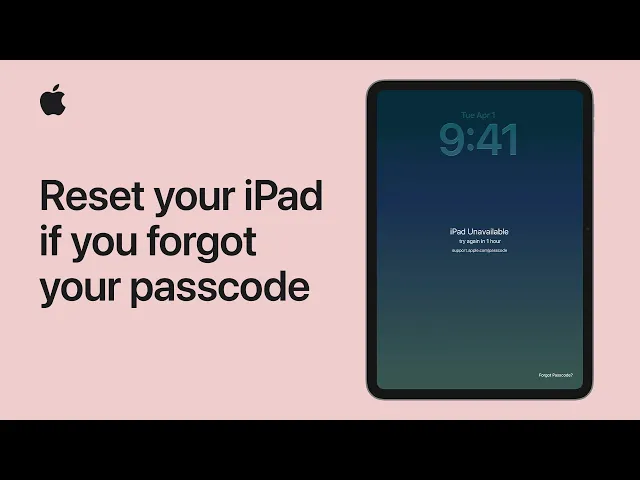
How to factory reset an iPad before selling it (step-by-step)

If you’re selling an iPad, factory resetting it isn’t optional. Skip the wipe and you’re handing the buyer your photos, your saved passwords, your email, your banking apps, and a device that’s still tied to your Apple Account. Skip it badly, and you ship them an expensive paperweight that won’t activate.
This guide walks through the full process the way it actually needs to be done in 2026: back up first, sign out of your Apple Account, erase the device, then officially remove it from your account. It works on every iPad model running a recent version of iPadOS, including iPad Pro M4, iPad Air, iPad mini, and the standard iPad.
If you’re still figuring out what to charge for your iPad, just text a photo to Hero Stuff or try the app and you’ll get an instant resale price based on real sold listings from Ebay and Facebook Marketplace. That way you’re not guessing before you list.
Why a factory reset matters before selling
A factory reset does three things at once:
1️⃣ It wipes your personal data so the buyer never sees it. 2️⃣ It signs the device out of your Apple Account so they can actually set it up. 3️⃣ And it removes Activation Lock, the security feature that turns an iPad into a brick if the previous owner is still tied to it.
The Activation Lock part is the one most sellers get wrong. If you don’t sign out of your Apple Account before erasing, the iPad will boot up to the “Hello” screen for the new owner, ask for your Apple ID and password, and refuse to go any further. The buyer will message you. If you’re lucky, you can fix it remotely. If you’re not, they file a return, leave a bad review, or ask for a partial refund.
Doing the steps in the right order solves all of this in about 15 minutes.
Before you start: what you’ll need
Before you tap anything, gather these:
Your Apple Account email and password
Your iPad passcode
A Wi-Fi connection
About 15 to 30 minutes for the full process (mostly waiting on the backup and erase)
If you can’t remember your Apple Account password, reset it at iforgot.apple.com before you go any further. You cannot complete this process without it.
Step 1: Back up your iPad
Once you erase the device, every photo, message, note, and app is gone. Permanently. So back it up first, even if you’re moving to an Android tablet and don’t plan to restore. Photos and contacts are worth saving.
You have two backup options.
Back up to iCloud. Open Settings, tap Your Name at the top, then iCloud, then iCloud Backup. Tap Back Up Now and stay connected to Wi-Fi until it finishes. The free iCloud tier only includes 5 GB, so if your iPad has more data than that, you’ll either need to pay for a temporary storage upgrade or use the second method.
Back up to a computer. Connect the iPad to a Mac with macOS Catalina or newer and open Finder, or to a Windows PC and open the Apple Devices app (or iTunes on older systems). Select your iPad, click Back Up Now, and check the box for “Encrypt local backup” if you want to preserve passwords and Health data. This is faster than iCloud and doesn’t cost anything.
Wait for the backup to complete before moving on. You’ll see a “Last Backup” timestamp when it’s done.
Step 2: Sign out of your Apple Account
This is the step that actually disables Activation Lock. Don’t skip it and don’t do it out of order.
Open Settings, tap Your Name at the top, scroll all the way to the bottom, and tap Sign Out. The iPad will ask for your Apple Account password to turn off Find My. Enter it.
You’ll then be asked whether you want to keep a copy of certain data on the device, things like contacts, calendars, and Safari data. It doesn’t matter what you choose here, since the next step erases everything anyway. Tap Sign Out, then confirm by tapping Sign Out again.
The iPad will return to the Settings screen, and the section that used to show your name will now say “Sign in to your iPad.” That’s how you know it worked.
Step 3: Erase all content and settings
Now you’re ready to wipe the device.
Go to Settings, tap General, then scroll to the bottom and tap Transfer or Reset iPad. Tap Erase All Content and Settings.
The iPad will show you a summary of what’s about to be deleted, including your Apple Pay cards and any saved data. Tap Continue. Enter your iPad passcode if asked.
If you have an eSIM and the iPad is cellular, you’ll be asked whether to erase the eSIM or keep it. If you’re selling, erase it. The buyer will set up their own carrier plan.
The iPad will restart and the screen will show the Apple logo with a progress bar. The full erase usually takes 5 to 15 minutes depending on how much data was on the device. When it’s done, the iPad boots to the “Hello” setup screen. That’s the proof it’s wiped.
Don’t go any further. Don’t set it up again. The next step is for the buyer.
Step 4: Remove the iPad from your Apple Account
Even after the erase, the iPad is still listed as a device on your Apple Account. Removing it officially is a final cleanup step that prevents weird issues with two-factor authentication codes and confirms the handoff is complete.
Go to account.apple.com on any browser and sign in. Scroll to the Devices section and click the iPad you just erased. Click Remove from Account and confirm. That’s it. The iPad is now fully detached from your account and ready to sell.
Watch the official Apple walkthrough
If you want to see the erase process in action, here’s the official Apple Support video covering an iPad reset:
The video focuses on resetting an iPad you can’t unlock, but the on-device steps are the same once you’re inside Settings. For the full Apple guidance on selling, see Apple’s official article on what to do before you sell, give away, or trade in your iPhone or iPad.
What to do if you’re locked out of the iPad
If your iPad is disabled, the screen is broken, you’ve forgotten the passcode, or it just won’t respond, you can still erase it. You have two options.
Erase it remotely. Go to iCloud.com on any device, sign in with your Apple Account, click Find My, choose the iPad, and click Erase iPad. The wipe will start the next time the iPad connects to the internet. After the erase completes, go back into Find My on iCloud.com and choose Remove from Account so Activation Lock is fully cleared.
Erase it through a computer using recovery mode. Connect the iPad to a Mac or PC with a USB cable. The button combination to enter recovery mode depends on your model. For iPads with Face ID or a top-mounted Touch ID button, press and quickly release Volume Up, then Volume Down, then press and hold the Top Button until the recovery mode screen appears. For iPads with a Home button, press and hold the Top Button and Home Button at the same time until you see the recovery screen. In Finder or the Apple Devices app, choose Restore. This downloads a fresh copy of iPadOS and wipes the device.
If you’re selling a damaged iPad and you’re worried about whether anyone will buy it, the answer is yes. Buyers will pay for parts or for a project device. Just be honest in the listing about the condition and the fact that it’s been remotely erased. A clean, accurate description sells faster than a perfect one with surprises.
Common mistakes that kill your sale
A few mistakes come up over and over with iPad sellers:
Erasing before signing out. This is the big one. Activation Lock stays on, the buyer can’t use the device, and you’re scrambling to fix it after the sale. Always sign out of your Apple Account first.
Forgetting to remove the iPad from your Apple Account. Not fatal, but it can cause two-factor authentication codes to keep getting sent to the device after the sale. Remove it through appleid.apple.com.
Leaving a screen protector and case on a beat-up iPad. Buyers want to see the actual device. Take off the case, clean the screen with a microfiber cloth, and photograph the iPad as it really looks. Hiding scuffs leads to disputes.
Not photographing serial numbers or storage details. A clear shot of the “About” screen showing the model, capacity, and serial number protects you from any post-sale claim that you misrepresented the device.
For more on photographing your listing properly, the ultimate guide to product photography covers the lighting and angles that actually move iPads off the marketplace.
How much is your iPad actually worth?
Before you list, know your number. iPad prices swing wildly based on model, year, storage, cellular vs Wi-Fi only, and condition. A 2024 iPad Pro 12.9-inch in great shape is a totally different sale than a 2019 iPad Air with a cracked back.
The fastest way to find out: try Hero Stuff for iOS or Android and you’ll get a price based on what iPads like yours actually sold for, not what hopeful sellers are asking. That’s the difference between pricing for a sale and pricing for a “make offer” inbox that never converts.
Where to sell your iPad
Once it’s wiped and ready, you’ve got a few solid options:
Ebay has the largest buyer pool for iPads and tends to fetch the best prices, especially for newer models. The tradeoff is fees and shipping. If you’re new to the platform, our beginner’s guide to selling on Ebay covers the full setup.
Facebook Marketplace is faster for local sales and has no selling fees. Best for older iPads or anyone who doesn’t want to deal with shipping. Just watch out for the standard scams; meet in a public place and only accept cash or in-person payment apps.
Apple Trade In, Amazon Trade-In, and Best Buy are the easiest options but pay the least. They’re worth it if you want a guaranteed offer and don’t want to handle the listing yourself.
Specialty buyback sites like Gazelle or SellCell sit in between. Lower than private sale, higher than trade-in, with the convenience of a prepaid shipping label.
For the highest payout, list it yourself on Ebay or Facebook Marketplace. For the easiest sale, trade it in. The right choice depends on how much your time is worth and how quickly you need the cash.
Final checklist before you ship or hand off the iPad
Before the iPad leaves your hands, run through this:
The device boots to the “Hello” setup screen, not your home screen. The iPad is no longer listed under Devices on appleid.apple.com. The SIM tray is empty if it’s a cellular model and you’re keeping the SIM. The screen is clean and any case or screen protector is removed unless it’s being sold with the device. The original box, charger, and cable are included if you have them; these add real money to the resale price.
Do those five things and your iPad sale will go smoothly. The buyer gets a clean, ready-to-set-up device. You get paid without follow-up messages. And your data stays yours.
Happy flipping 🤑

Hero is now available globally 🇩🇪 🇪🇬 🇮🇳

Four new ways to sell with Hero

Introducing Studio Photos: Turn one photo into six studio shots
How to factory reset an iPad before selling it (step-by-step)

Best items to resell for profit in 2026 (including thrift store finds)

How to factory reset a Google Chromebook before selling it on eBay or Facebook

How to find out what anything is worth before you sell it